SCHOOL OF ARCHITECTURE, BUILDING & DESIGN

.png)
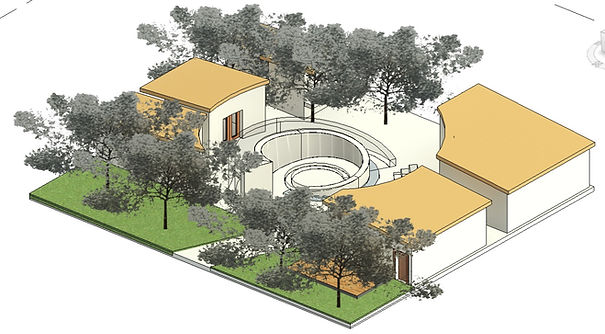
Work In Progress
Step 1
Grid line were carefully measured on the overall dimensions in order to be clear about the placement of columns and walls.
.png)
.png)
Step 2
Firstly, I started off with placing a wide floor slab to elevate structure from it from ground.
Secondly, another two floor on the entrance was added for the soft-scape that was yet to be done soon
Thirdly, I also added floor for outdoor spaces and stepping planks.
Step 3
I used massing to make the curve for the centre gathering space, because it's easier to curve with different heights.
.png)
_edited.jpg)
.png)
Step 4
Walls are implemented into completed massing. After that, walls are placed onto grid lines to form facade walls of different spaces.
.png)


Step 5
To do slanted roof, I click on roof footprint option and adjust to the size that I needed. Then, proceed to turn off all the define slop except for the angle that needed to be tilt at 5 degrees. For the washroom, slanted roof wasn't necessary so I decided to go with flat roof by untick all boxes of define slop.
_edited.jpg)
_edited.jpg)


_edited.jpg)
_edited.jpg)
_edited.jpg)
Schedule is to display all the information of spaces in a table. To make a schedule,


Placing Documentation
To form a documentation :
Step1 : Load in a A1 template given by lecturer in Times
Step 2 : Fill up the information on the right - hand side of the template.
Step 3 : Drag orthographic from the left - hand corner into the template and arrange.


.png)


_edited.jpg)
Step 1 : Go to 'View', press 'schedule'
Step 2 : Select 'Room' from Category and press 'Okay'
Step 3 : Then, select 'Area' and 'Name' from available field


.png)
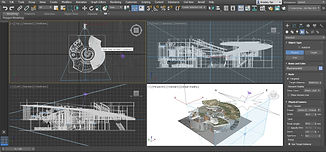
Exterior Rendering
.png)
.png)
1
Units Setup :
First, I check my units at the 'customize' option and press 'unit setup' to make sure it is in millimeters.
System Unit Setup stated " 1Unit = 1.0 Millimeters "
.png)
.png)
2
Auto Backup :
Then, check if the 'Auto Backup' is turn on from the 'File > Preferences > Auto Backup' .
.png)
.png)
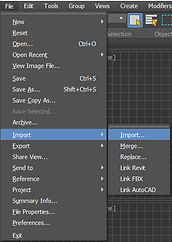
3
Import :
Secondly, I export my Revit file to FBX then import the FBX file into 3Ds Max.
_edited.jpg)
.png)
.png)
4
Camera :
By setting up camera, I choose physical camera from command panel.
_edited.jpg)
5
Adjusting :
After placing camera, adjust the best angle to capture exterior elements and change the level of camera to eye-level, which is 1500.
_edited.jpg)
_edited.jpg)
_edited.jpg)
6
Sun Placement :
To create the sun by using the Sun Positioner tool. Then, select 'camera' from 'create' option and click physical camera. After placing the sun, I adjust the compass radius to 100mm and set the Sun Position to manual.
6
Values:
Later, I select 'Rendering' and click 'Environment' with the 'Physical Sun & Sky Environment' in the 'Environment Map' section. After that, click the Render Setup tool and assign ART Renderer as the renderer. In order to get good picture, I begin to adjust the corresponding Aperture, Shutter speed and ISO Exposure Gain.
_edited.jpg)
Lastly, I preview to render to see if I was satisfied with it. Then, proceed to rendering with ART Rendering and adjust the expose and contrast and brightness. After completing the render, I saved it into my file.
.png)
.png)
Exterior Rendering Outcome

Interior Rendering
.png)
Physical Camera :
By using the previous 3DS Max file, place a Physical Camera at the interior and adjust the focal length to 18mm. After placing the camera, the Z height is adjusted to the eye level which is 1500mm.
.png)
.png)
Interior Rendering Outcome

.png)
.png)
.png)